
Última actualización el October 19, 2026
Transforming the everyday into a learning experience doesn’t require complex materials. At Little Peques Studio, we love the concept of upcycling; taking simple household items and giving them a second, creative life. A humble cardboard roll serves as an exceptional blank canvas for practicing manual precision, scissor control, and texture exploration with your little ones.
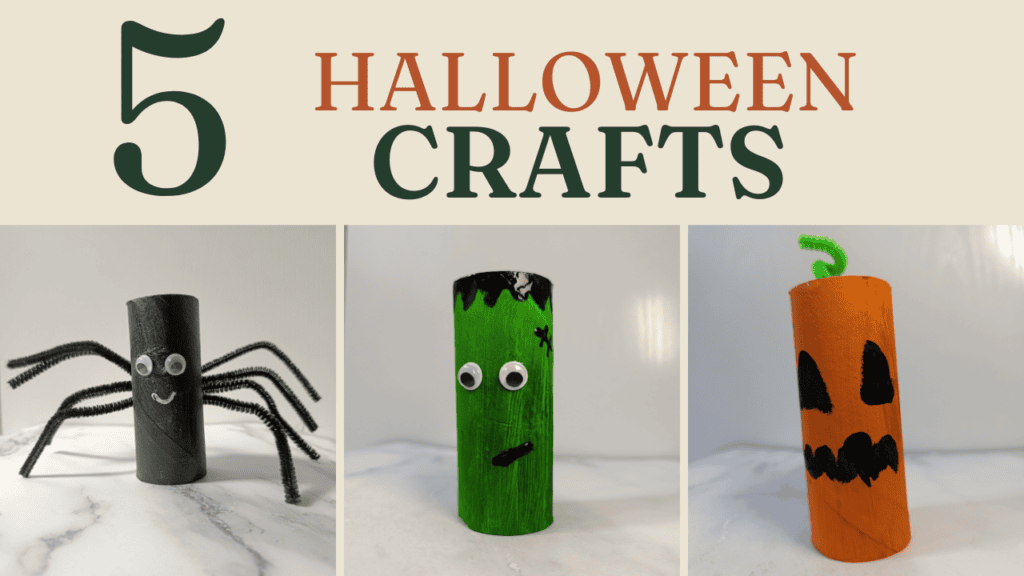
Below are 5 classic, sweet Halloween characters designed to work on key developmental skills while keeping the atmosphere calm and playful.
Adaptations for Little Creators (Ages 2 to 3)
These activities can be enjoyed starting from age 2. At this stage, the focus is never on a “perfect” final product, but rather on the free, sensory exploration of materials. To guarantee safety and independence:
- Visual Safety: Swap small plastic googly eyes for round adhesive dot stickers to eliminate choking hazards.
- Frustration-Free Scissor Practice: Prepare complex shapes in advance (like wings or legs) and invite your toddler to fold, tear, or glue.
- Adapted Paint: Use solid paint sticks or washable finger paints instead of liquid watercolors or tempera.
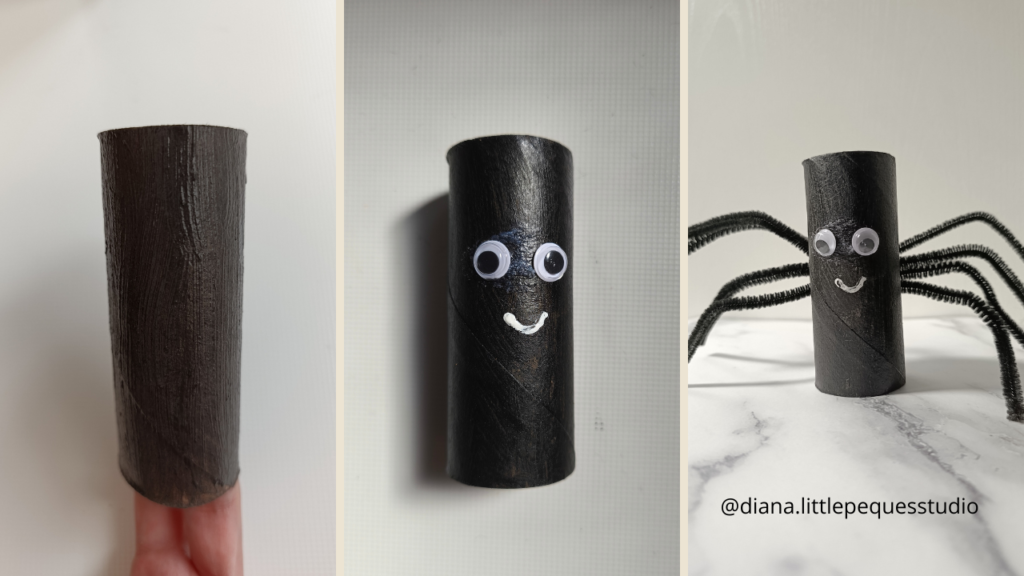
1. Pipe Cleaner Spider (Threading, Molding, and Hand Strength)
This project combines sturdy cardboard with a soft, malleable material that stimulates fine motor skills through threading.
- Materials: Cardboard roll cut in half, black paint, 4 black pipe cleaners (folded to make 8 legs), single hole puncher, and adhesive eye stickers.
- Step-by-Step: Paint the roll black. Once dry, punch 4 small holes on each side of the tube. Invite your child to thread a pipe cleaner from one side to the other and bend the ends down to shape the legs. Finish by adding eye stickers to the front.
- Developmental Benefit: Encourages pincer grasp precision, hand-eye coordination through threading, and hand strength by molding soft wire.
- Toddler Tip: Punch the holes ahead of time. Let your toddler insert the pipe cleaners at their own pace without worrying about symmetry.
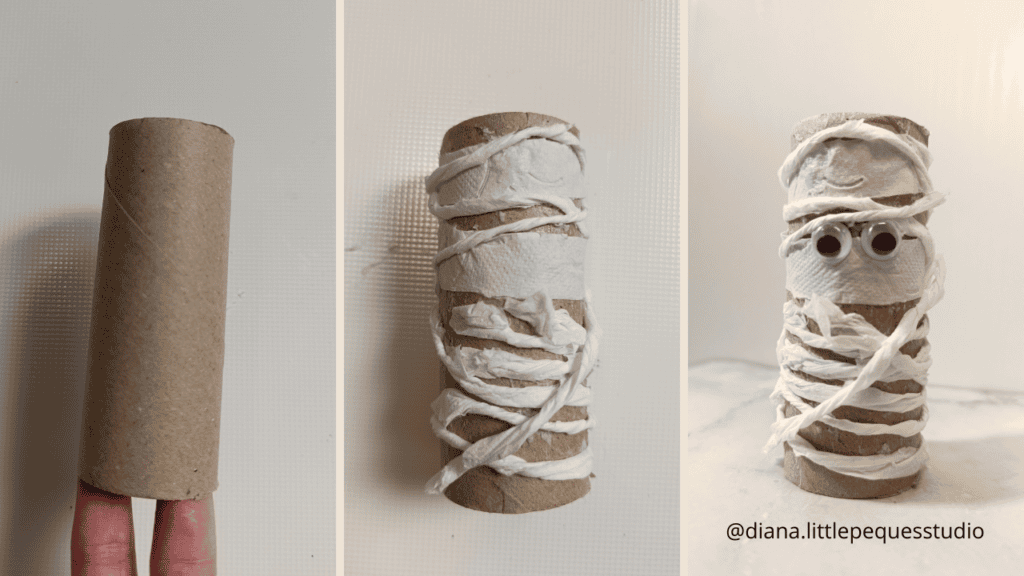
2. Wrapped Mummy (Bimanual Coordination and Precision)
A fantastic exercise to practice bilateral integration (using both hands together in a coordinated way).
- Materials: Cardboard tube, paper towel strips or painter’s tape (masking tape), cardstock for arms, and eye stickers.
- Step-by-Step: Invite your child to wrap the cardboard with paper strips or tape. Finish by placing the eyes peeking through the folds.
- Developmental Benefit: Develops hand-eye coordination, pressure control, and bilateral hand usage.
- Toddler Tip: Painter’s tape is ideal for small hands; toddlers love the tactile sensation of the tape and it is easy to peel and position.
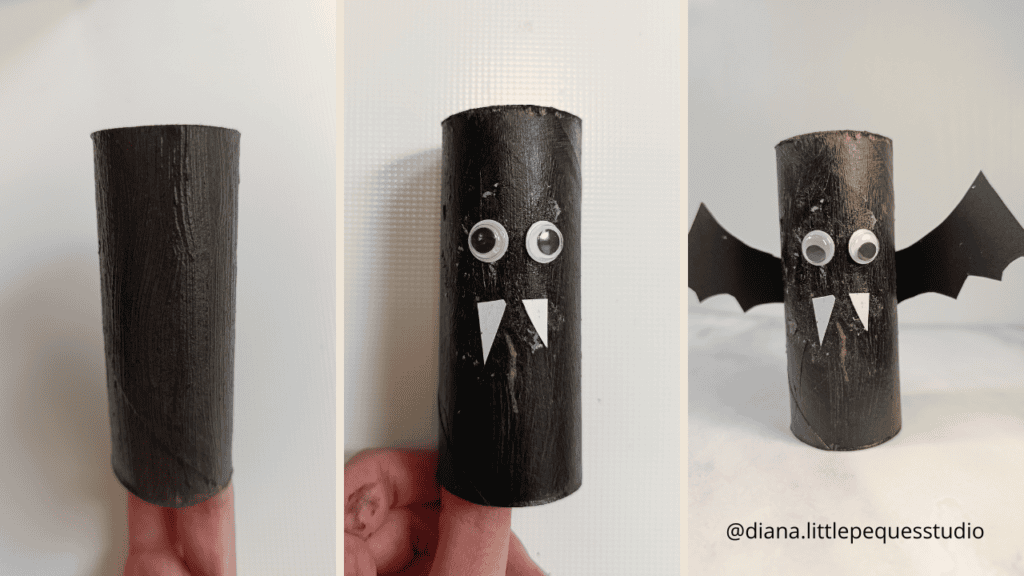
3. Bat with Wings (Symmetrical Cutting and Coordination)
A sweet classic figure where we practice symmetry and basic geometric shapes.
- Materials: Cardboard roll painted black (or wrapped in black cardstock), purple or black cardstock for wings, white cardstock for fangs, and eye stickers.
- Step-by-Step: Cut out the wing outline. Glue the tube to the center of the wings, add the eyes, and attach two small white paper triangles for fangs.
- Developmental Benefit: Recognition of geometric shapes (triangles, arches) and spatial symmetry.
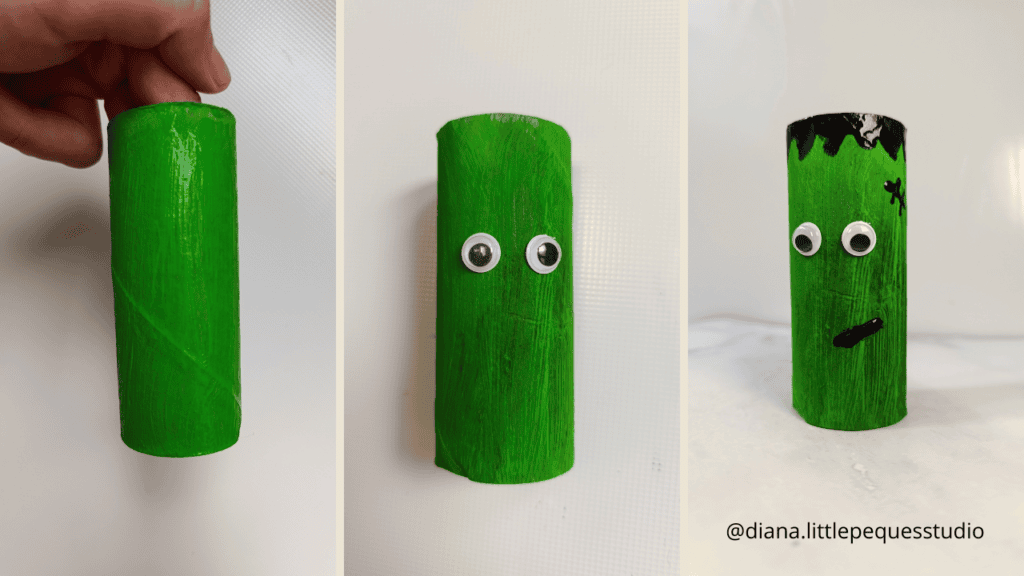
4. Frankenstein (Structure and Precise Details)
This craft helps children focus on facial expressions and fine details.
- Materials: Tube wrapped or painted green, thick black marker or cardstock, and eye stickers.
- Step-by-Step: Cover the tube in green. Add a strip of black cardstock with jagged points to simulate hair. Add eyes and draw gentle scars on the sides.
- Developmental Benefit: Stimulates attention to detail and spatial planning.
- Toddler Tip: Let little ones draw the scars themselves with a thick marker, celebrate their unique lines and shapes!
5. Creative Pumpkin (Using Pipe Cleaners and Volume)
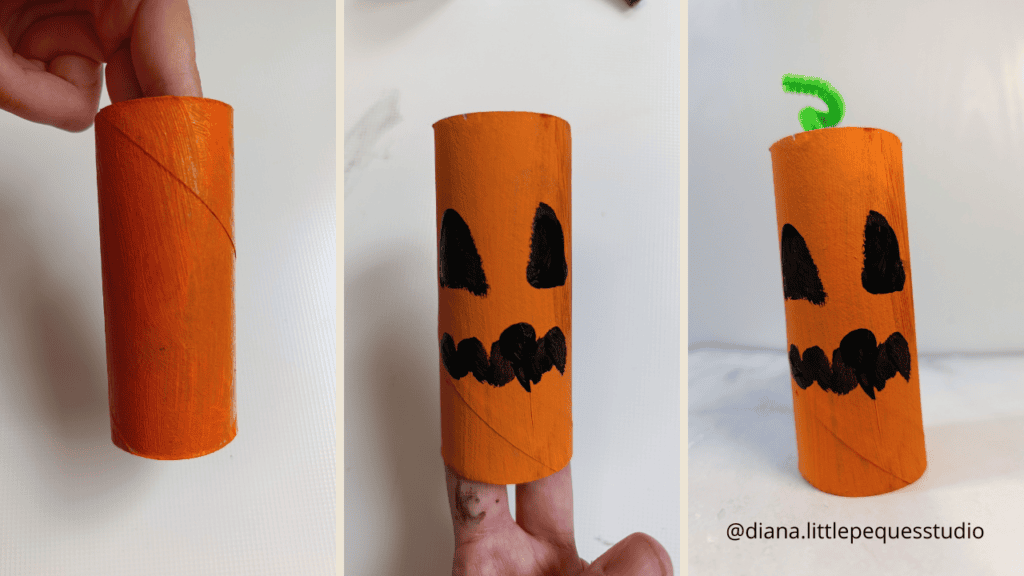
A vibrant project introducing different textures and shapes.
- Materials: Tube wrapped in orange cardstock, black geometric stickers (triangles), and a green pipe cleaner.
- Step-by-Step: Wrap the tube in orange. Place black stickers for the face (triangles for eyes and nose). For the stem, coil a green pipe cleaner and insert it into the top of the roll.
- Developmental Benefit: Encourages the manipulation of materials with varying elasticities and textures.
🎃 Free Printable: Halloween Keepsakes for Little Hands
To make your Halloween crafting even more meaningful, I’ve created a special Free Halloween Keepsake Printable! It’s designed to capture your toddler’s tiny footprints and handprints as a sweet memory of this season.
👉 [ Click here to download your Free Halloween Keepsakes ]
🌿 Let’s Connect Every Day
If you love simple, sustainable, and Montessori-inspired activity ideas for your home:
- Save this post on Pinterest to keep your autumn activity board full of calm, fun ideas.
- Share it with a fellow parent or teacher who is looking for eco-friendly craft inspiration.
- Follow us on Instagram: Join our community at @diana.littlepequesstudio for daily slow living inspiration, toddler activity previews, and printable resources.